IntelliJ IDEA Setup
| If you suck at coding, you will still continue to suck. However, I can guarantee that following this tutorial will make you suck harder, faster, and more creatively than ever before!
- kazi, creator of and referring to the original IntelliJ tutorial |
By the end of this tutorial, you will have:
- Configured IntelliJ for editing and compiling your mod's code into a .jar.
- Set up the Starsector/LazyLib/GraphicsLib javadocs from within IntelliJ.
- Created a one-click build & debug configuration for your mod and Starsector.
- Learned some tips and tricks to impress the Notepad users.
This tutorial is built using IntelliJ IDEA 2023.1 and is up to date as of May 2023.
| An alternative guide for using the IntelliJ template is available here: Wisp's IntelliJ Mod Template. |
Download and install IntelliJ
- Download (see below image) and install IntelliJ IDEA. . The Community Edition is free and recommended, and is a roughly 650 MB download.
 do not be fooled by their tricks
- Any install options are valid. You may wish to avoid associating .java files with IntelliJ in favor of opening them with a quicker-to-open text editor, such as VS Code or Notepad++.
Creating a project
To focus specifically on IntelliJ setup and reduce the risk of mistakes, this tutorial is going to configure a pre-existing template mod, rather than start from a blank, generic Java project.
- Download the latest version of the template from here and extract it to your Starsector mods folder as if it were a regular mod.
- The path should be
mods/Starsector-IntelliJ-Template-main/mod_info.json.
- The path should be
- Open IntelliJ IDEA. It should be displaying a splash screen if newly installed.
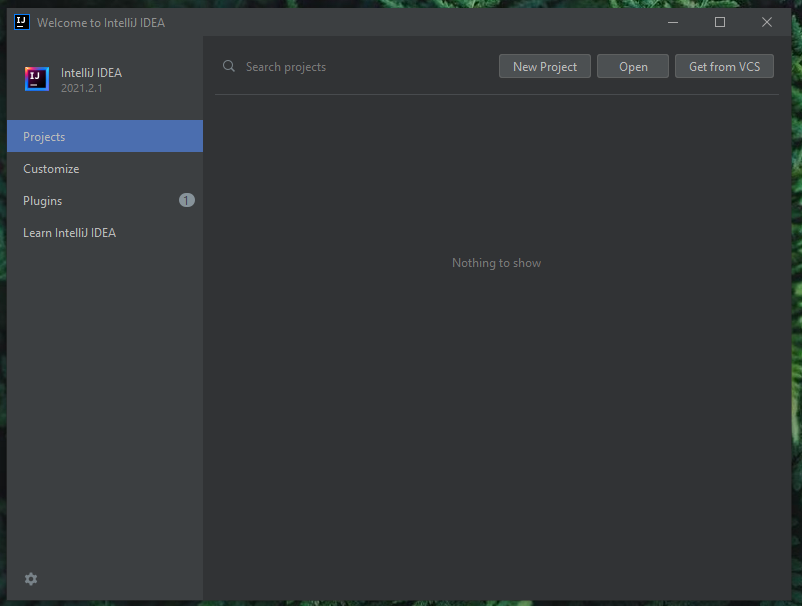
- If IntelliJ is already open to a project, navigate to File - Close Project to return to the splash screen.
- From the IntelliJ splash screen, choose "Open" and then select the folder you just extracted, containing the template. The folder should contain a
mod_info.jsonfile. Select the folder (not themod_infofile) and click "OK".

IntelliJ will load the project and add a .iml file and a .idea folder. These can be ignored; they contain the IntelliJ-specific project settings, which we will modify in the next stage.
Feel free to look around the project and get a feel for how it's laid out, but don't change anything yet. Next, we'll configure the JDK, add the Starsector and other libraries so it compiles, tell it how to create a .jar, and more.
Java configuration
- Go to File - Project Structure and go to the Project tab, under Project Settings.
- Under Project SDK, click the dropdown and choose
+ Add SDK, thenDownload JDK..., choose 1.8 for Version, and ideally one that says "Azul Zulu" but if you don't see it, any are ok. Click OK.- If downloading isn't working for whatever reason, you can download JDK 1.7 here: JDK 1.7.
- Under Project language level, open the dropdown and choose
7. - Click "OK" or "Apply".
When configured, the Project Structure dialog should look as follows:

Adding dependencies
Dependencies are things that a project needs in order to compile. At the very least, a mod will need to add Starsector's .jar files as dependencies, and a combination of LazyLib, MagicLib, and GraphicsLib will be needed, as well.
Vanilla Dependencies
- Open the Project Structure dialog again, if it isn't open, and go to the "Libraries" tab, under "Project Settings".
- Select
starfarer.api.- If your game is installed to the default location on Windows, this should be ready to go.
- If the file paths are red, then EITHER
- delete all of the red paths, then click the + (next to the + with a globe), navigate to your Starsector installation, open starsector-core, and choose all of the .jar files, plus
starfarer.api.zip. It will ask which module to add them to. There is only one, so keep it selected and click OK. - OR, referencing the screenshot below, edit the
starfarer_api.xmlfile to fix the file paths.
- delete all of the red paths, then click the + (next to the + with a globe), navigate to your Starsector installation, open starsector-core, and choose all of the .jar files, plus

- Click Apply to save the dependency.
- Note: If any of the dependencies are grayed out, indicating that they are unused, right-click on them and click "Add to modules", then select the only module and click OK.
Mod Library Dependencies
- Click the + at the top of the middle-left column of the Project Structure -> Project Settings -> Libraries window (above
starfarer.apiin the above screenshot), and choose "Java" to create a new Java dependency, then navigate to your mods folder, to LazyLib, and selectjars/LazyLib.jarandjavadoc.zip(use shift-click or control-click to select multiple items at once. Click OK.). Add it to the module. - Repeat the same step to add the other two dependencies needed.
- GraphicsLib: Add
jars/Graphics.jarand thejavadocfolder (if IntelliJ asks, tell it that it is a Javadoc). - Nexerelin: Add
jars/ExerelinCore.jar. If it asks to confirm the source root, just click OK.
- GraphicsLib: Add
- Note: If any of the dependencies are grayed out, indicating that they are unused, right-click on them and click "Add to modules", then select the only module and click OK.
- Click Apply to save your progress.
Dependencies Wrapup
Once dependencies are added, still in the Project Structure dialog, click the "Modules" tab, under "Project Settings". The one module there should already be selected, so look at the top-right for the Dependencies tab and click it.
Ensure that the dependencies you just added are all there and, if not, click the + sign and add them using "JARs or Directories" to find them.
Building a .jar
This is pre-configured, but should be customized for your mod. By default, it will create a .jar file called Template.jar.
- Open the Project Structure dialog again, if it isn't open, and go to the "Artifacts" tab, under "Project Settings".
- Choose
Create .jar, right-clickTemplate.jar, select Rename, and choose a new name. Make sure to update themod_info.jsonfile with the new name.
- Close the dialog and go ahead and Build Project (from the hammer icon or from the menu, Build - Build Project). The .jar should be created in the jars folder.

Running and debugging
At this point, the mod should compile and create a .jar. Next, we'll get it running in-game and attach a debugger to it.
| A debugger is a program that can examine the state of your program while your program is running. The technical means it uses for doing this are not important for understanding the basics of how to use a debugger. You can use a debugger to halt the execution of your program when it reaches a particular place in your code, then examine the values of the variables in the program. You can use a debugger to run your program very slowly, one line of code at a time (called single stepping), while you examine the values of its variables. |
- The mod must be in the game's
modsfolder to load. There are a couple of ways of going about this.- Simple: If it isn't already in the game mods folder, close IntelliJ, move the whole mod folder into Starsector's
modsfolder, then reopen IntelliJ and open the mod from its new location. - Complicated: Create a symbolic link of the mod folder in Starsector's
modsfolder without moving the folder itself. This can be done using Command Prompt or a tool such as Link Shell Extension.
- Simple: If it isn't already in the game mods folder, close IntelliJ, move the whole mod folder into Starsector's
- Starsector does not, by default, allow itself to be debugged (this is standard for the release/distributed version of programs). We will tell the game to wait and allow the IntelliJ debugger to attach before starting the game in a separate process.
- This template has what's called a Run/Debug Configuration set up by default - this is what tells IntelliJ how to launch Starsector in Debug mode and let us debug it.
- If your game is not installed to the default Windows location, we just need to fix that.
- Choose from the menu Run - Edit Configurations to open the Run/Debug Configurations dialog.
- For Working directory, choose your Starsector installation path. The default is
C:\Program Files (x86)\Fractal Softworks\Starsector\starsector-core.
- For Working directory, choose your Starsector installation path. The default is
- Choose from the menu Run - Edit Configurations to open the Run/Debug Configurations dialog.

- Click OK to close the Run/Debug Configuration window.
- Select the configuration ("Run Starsector") from the dropdown menu next to the Debug icon (a green bug) in the top-left of IntelliJ, then click the green Debug button.
- If everything worked properly, the game should launch. Don't forget to enable the mod in the launcher!
- If it crashes, check the error message: the template is set up to crash with a descriptive error so that we know the game is running the template's code. Go ahead and delete the code that causes the crash (it's in the only .java file).
- Set some breakpoints to test out the debugger by opening a code file, then clicking in the empty space to the right of a line number. The line of code in
onGameLoadis a good place to start. - Changing code within methods without restarting the game is now possible as well. Change the code, click the green hammer Build button, and a notification should appear that classes have been reloaded. It may be a good idea to quickload from a recent save after modifying code in this way, as it can cause crashes. Still, it is much faster than relaunching the game after every change.
Next steps
Your blank template is up and running (if not, triple-check that all steps were followed correctly), so get to work. Update the mod_info.json. Make it your own. Change the default package from author.modname Good luck, have fun!
IntelliJ Tips and Tricks
Nyan progressbar
Changes progress bars to Nyan cats.
Install the plugin from here: https://plugins.jetbrains.com/plugin/8575-nyan-progress-bar
Open anything quickly
Double-tap Shift to open a launcher, then start typing. Most things can be opened this way; files, classes, methods, field variables, IntelliJ windows and settings, even launching the "Debug Starsector" configuration.
It's not just limited to the current project, either. Double-tap Shift again to search for anything in dependencies, such as vanilla Starsector, Lazylib, etc.

Quick view documentation
Click on a class or method and press Ctrl-Q to view the documentation for the symbol.
Rename a method/variable everywhere
Click a method or variable (these are called symbols) and press Shift-F6, then rename the variable. IntelliJ will try to rename it everywhere it is used.
Copy/paste history
Press Ctrl-Shift-V to bring up all of the recent items that have been copied to the clipboard. Note that this feature is built into Windows now as well, accessible via WinKey-V.
Scrollbar minimap
This plugin adds a minimap to the scrollbar, like the one found in VS Code. Useful for seeing the outline of a file and your location within it at a glance.
https://plugins.jetbrains.com/plugin/17017-codeglance3
And more
There are far more tips and tricks available from https://www.jetbrains.com/help/idea/pro-tips.html.
- Potentially outdated
- Modding